
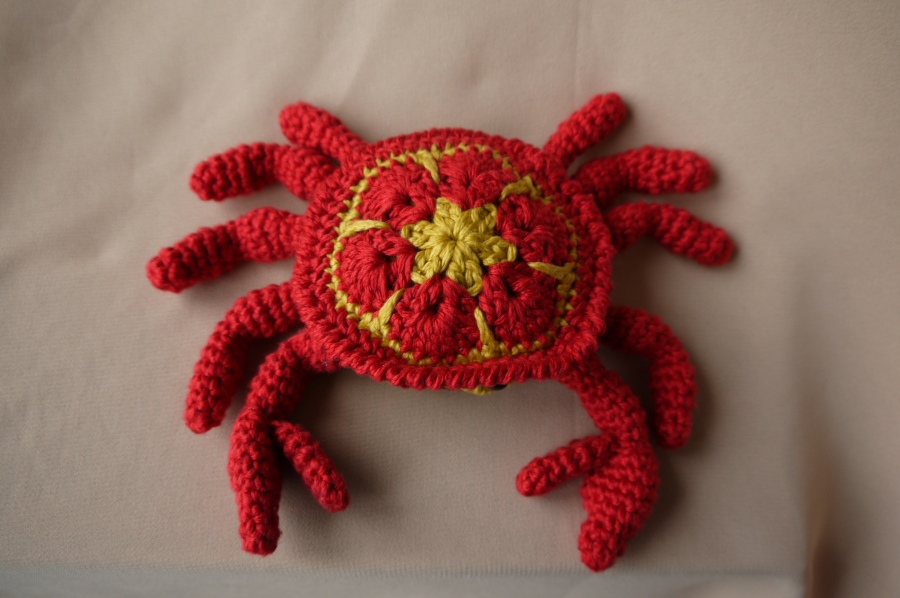
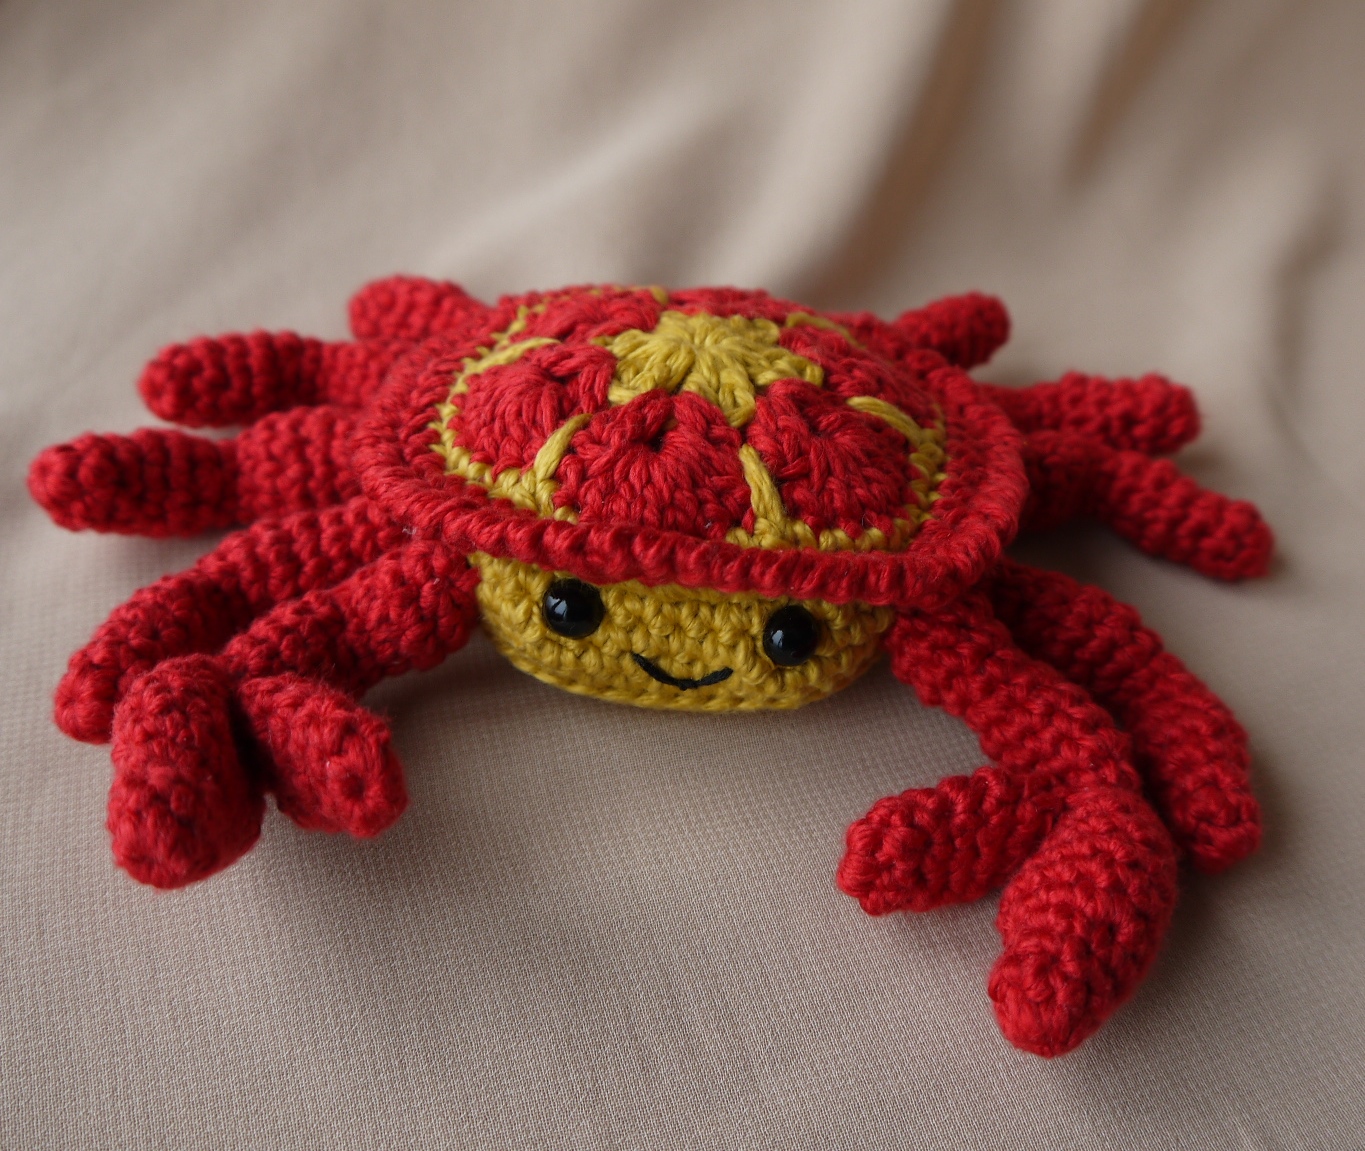
When a friend asked me to crochet him a crab for a crab-loving friend of his, I decided to have a go at designing one. After several attempts, frogging and starting again (which meant he had to wait longer than planned), I'm pleased to introduce Cedric the crab.
Cedric is a happy little chap. He can bend his claws thanks to pipe cleaners, and he peers out from beneath his African flower shell, bordered with (yes, you guessed), crab stitch!
To make Cedric, you'll need a small amount of DK yarn in two colours (more for the claws colour than for the body colour), a 3mm crochet hook, a small amount of polyfil, two 6mm safety eyes, a tiny strand of black embroidery thread (for the mouth), and a blunt tapestry needle or bodkin.
As I mention in most of my patterns, I have chosen to enclose the polyfil in a piece of old tights.
However, the construction of the crab means that if you crochet tightly, you may not need to do this. There are holes in the African flower, but the crab body is closed up beneath the flower so you may be able to get away with not lining.
Please note that because of the pipe cleaners in the legs, this toy is not suitable for very young children. You can stuff the legs instead of using pipe cleaners, but this will not obtain the same result. And if you want to offer it to young children, you may prefer to replace the safety eyes with embroidered eyes.
You are welcome to sell any crabs you make, but please do not sell this pattern. Do not post this pattern to any website, but link directly to my blog. No file sharing of this pattern. Please respect my designer rights.
Special thanks to Heidi Bears for her tutorial for the African flower pattern, which is an integral part of this design. And thanks to Tamara Kelly for her video explanation of the crab stitch. You'll find links at the relevant points in the pattern below.
If you make a crab using this pattern, it would be great to see it on our flickr page, or share it on the Is it a toy crochet Facebook page. Likes, shares and comments guaranteed!
I shall refer to red yarn and yellow yarn as those are the colours I chose and that correspond to the photo. The crab would look great in other colour combinations too.
Finally, there may still be some errors or incongruences in the pattern. If you have any questions, tips or comments, please post them below.
The ten legs/claws are the longest part of this pattern, so I suggest you start with those. The rest is plain sailing.
If you want to stuff the legs, do so as you go along. If you choose to use pipe cleaners, that's explained below.
Big claws (make 2)
With red
Rnd 1 - Start with a magic circle and 6 sc (for a tutorial on how to make a magic circle, see this video http://www.youtube.com/watch?v=WLuSVyKvoUg)
Rnd 2-3 - Sc around (6 sts)
Rnd 4 - [2sc in next st, 1sc in next st] three times (9 sts)
Rnd 5 - [1sc in next 2 sts, 2sc in next st] three times (12 sts)
Rnd 6-8 - sc around (12 sts)
Rnd 9 - [1sc in next st, sc2tog] three times (9 sts)
Rnd 10 - In back loops only: [1sc in next st, sc2tog] three times (6 sts)
Rnd 11 - In both loops: [2sc in next st, 1sc in next st] three times (9 sts)
Rnd 12-14 - sc around (9 sts)
Rnd 15 - [1sc in next st, sc2tog] three times (6 sts)
Rnd 16 - sc around (6 sts)
Rnd 17 - [2sc in next st, 1sc in next st] three times (9 sts)
Rnd 18-19 - sc around (9 sts)
Now make the "thumb"
With red
Rnd 1 - Start with a magic circle and 6 sc
Rnd 2-3 - sc around (6 sts)
Rnd 4 - [2sc in next st, 1sc in next st] three times (9 sts)
Rnd 5 - sc around
Rnd 6 - [1sc in next st, sc2tog] three times (6 sts)
Finish off, leaving a tail of yarn for sewing. Press sides together and sew through both layers and on to three of the visible loops on Rnd 10.
Back legs (make 6)
With red
Rnd 1 - Start with a magic circle and 6 sc
Rnd 2-3 - Sc around (6 sts)
Rnd 4 - [2sc in next st, 1sc in next st] three times (9 sts)
Rnd 5 - sc around (9 sts)
Rnd 6 - [1sc in next st, sc2tog] three times (6 sts)
Rnd 7-8 - sc around (6 sts)
Rnd 9 - [2sc in next st, 1sc in next st] three times (9 sts)
Rnd 10-11 - sc around (9 sts)
Rnd 12 - [1sc in next st, sc2tog] three times (6 sts)
Rnd 13-15 - sc around (6sts)
Finish off, leaving a long tail of yarn for sewing
For each leg, fold a pipe cleaner in two and enter the folded end into the leg, pushing it to the tip. Trim the ends, folding them back into the leg to avoid pointed ends sticking out. You don't need to put pipe cleaners into the very back legs:
Very back legs (make 2)
With red
Rnd 1 - Start with a magic circle and 6 sc
Rnd 2-3 - Sc around (6 sts)
Rnd 4 - [2sc in next st, 1sc in next st] three times (9 sts)
Rnd 5 - [1sc in next st, sc2tog] three times (6 sts)
Rnd 6-11 - sc around (6 sts)
Finish off, leaving a long tail of yarn for sewing
Body (make 1)
With yellow
Rnd 1 - Start with a magic circle and 6 sc
Rnd 2 - 2sc in each st around (12 sts)
Rnd 3 - [2sc in next st, 1 sc in next st] rep around (18 sts)
Rnd 4 - [2sc in next st, 1sc in each of next st 2st] rep around (24 sts)
Rnd 5 - [2sc in next st, 1sc in each of next st 3st] rep around (30 sts)
Rnd 6 - [2sc in next st, 1sc in each of next st 4st] rep around (36 sts)
Rnd 7 - [2sc in next st, 1sc in each of next st 5st] rep around (42 sts)
Rnd 8 - [2sc in next st, 1sc in each of next st 6st] rep around (48 sts)
Rnd 9 - In back loop only: sc around (48 sts)
Rnd 10-12 - In both loops: sc around (48 sts)
Rnd 13 - In back loop only: [sc in each of next 6st, sc2tog] rep around (42 sts)
Rnd 14 - [sc in each of next 5st, sc2tog] rep around (36 sts)
Rnd 15 - [sc in each of next 4st, sc2tog] rep around (30 sts)
Attach the safety eyes betwee row 11 and 12. Embroider mouth between rows 9 and 10.
Sew on the legs, starting with the big claws, placing each one about 1 cm from the face. Continue to sew the legs on, one on each side at a time, keeping them as symmetrical as you can.
Place stuffing pillow (made from 2 round pieces cut out from a pair of old tights, sewn together, stuffed and close up the hole) or start stuffing.
Rnd 16 - [sc in each of next 3st, sc2tog] rep around (24 sts)
Rnd 17 - [sc in each of next 2st, sc2tog] rep around (18 sts)
Finish stuffing.
Rnd 18 - [sc in next st, sc2tog] rep around (12 sts)
Rnd 19 - sc2tog to end (6 sts)
Sew the hole closed, fasten off and bury the end of yarn inside the body.
African flower shell
Make a two-tone African Flower. You can follow Heidi Bears' tutorial here, but please note that it is slightly different towards the end, so check the round-by-round instructions below too.
http://heidibearscreative.blogspot.fr/2010/05/african-flower-hexagon-crochet-tutorial.html
Some of these instructions are copied from Heidi Bear's website, with her permission.
Rnd 1 - With yellow - Make a magic circle. Ch 3, 1 dc, 1ch. [2dc 1ch] five more times, so you end up with six 2dc groups, separated by a ch. Make 1 final ch and sl st into the 3rd ch of the initial 3 ch. Cut yarn
Rnd 2 - With red - Insert hook into the space just to the right of the 3ch leg from the previous round. Yarn around hook, pull yarn through, ch3 (counts as 1dc). 1dc into the same space, ch 1 and make 2dc into the same space again.
Work the same 2dc, ch1, 2dc into each ch sp around. You will have six groups. Sl st to the 3rd chain to finish the round
Rnd 3 - With red - Insert your hook into the space created by the chain stitch between the 2dcs. Ch 3 (counts as 1dc)
Make 6 further dc into the same space. There should be 7 dc. Continue with 7dc in each ch sp. You will have six 7dc groups. Sl st into top of 3ch.
Cut yarn, join yellow.
Rnd 4 - with yellow - 1 sc into each of next 7 sts. Now work a long dc into the space just above the
yellow "petal" of Rnd 1. Look at Heidi Bear's tutorial for guidance :)
Continue to work you way around the hexagon...7sc, dc, 7sc, dc etc, until you get back to the beginning...as always, join the round by slip stitch into the first sc.
Cut yarn, join red.
Rnd 5 - with red - Working in front loop only. Sc around, but working 2sc in the fourth stitch at the centre of each "petal".
(In rnd 5 I may have used hdc rather than sc, but sc will make a smaller shell, which may look better. Please feel free to experiment!)
Rnd 6 - with red - crab stitch around (see Tamara's great video explaining how to do crab stitch, here: http://www.mooglyblog.com/reverse-single-crochet-crab-stitch/)
Fasten off and weave in the last yarn end. The others can be simply trimmed as they will not be visible when the crab is completed.
Now, using the two visible lines of stiches made which stitching into front stitch or back stitch only, sew the shell onto the crab's body. And you're done!
really cute...... amazing the combinations of colours.....
ReplyDeleteAmazing. What a wonderful pattern. Thank you for sharing it.
ReplyDeleteThank you :)
ReplyDeleteThanks so much for sharing this, I so luv it and will be making it very soon....:) Carolyn
ReplyDelete:) He's ACE
ReplyDeleteI love this creature! So original. :-)
ReplyDeleteSo Adorable! I am looking forward to making several Cedrics!
ReplyDeletei would like to make one of this..!!
ReplyDeleteThank you so much for the pattern! This is going to be made with stuffed legs and extra safe safety eyes for my new nephew!
ReplyDeleteFor a baby you could also add a rattle insert in the body part.
DeleteI love the the crab. Can I down load the pattern? If so how?
ReplyDeleteHow big is he?
ReplyDelete